Wednesday, August 31, 2011

Pancit Bihon

Hey Everyone. I am back with other DEElicious recipe, pancit bihon. Whenever I update my status saying I made pancit I have someone asking for a recipe =) So, I wanted to share this recipe for you pancit eating mother humpers LOL!!!

Pancit Bihon

Pancit Bihon is made with thin white rice noodles. I think when I crave for pancit I want pancit bihon more than pancit canton which is the yellow thick noodles. Some people mix both noodles. Oh, I love it when my grandma would cook pancit. Melt in your mouth goodness. Miss and Love you GMA!!


Things that I used:

- 2 pkgs of pancit bihon rice noodles
- a handful of green beans, julienned
- 3 small carrots, julienned
- half a cabbage, cut into stripes
- 1 medium onion
- 3 garlic cloves, chopped

SUGGESTION: Cut all veggies and shred chicken before hand to make cooking time faster.


- 3 Tbs Oyster Sauce
- 1 Chicken Cube
- 1 can or more Reduced Sodium Chicken Broth
- Black Pepper
- Garlic Powder


- 1 Rotisserie Chicken
* SIDE NOTE: You can use fresh chicken breast and boil it. I was lazy to do that =)

 
First things first...Soak your noodles in water. It should take about 10-15 mins to loosen up.


Got my chicken shredded and my veggies chopped and ready to go. LETS START COOKING!

 
First saute the onions til for bout 3-4 mins.


Then add the garlic.


After 5 mins or so add the carrots and green beans.


When the carrots are cooked hmm lets say 5-7 mins add chicken and mix well. Since the chicken is already cooked this won't take long.


Add your seasonings: Pepper and Garlic Powder and mix well!


Add your oyster sauce. Mix well.


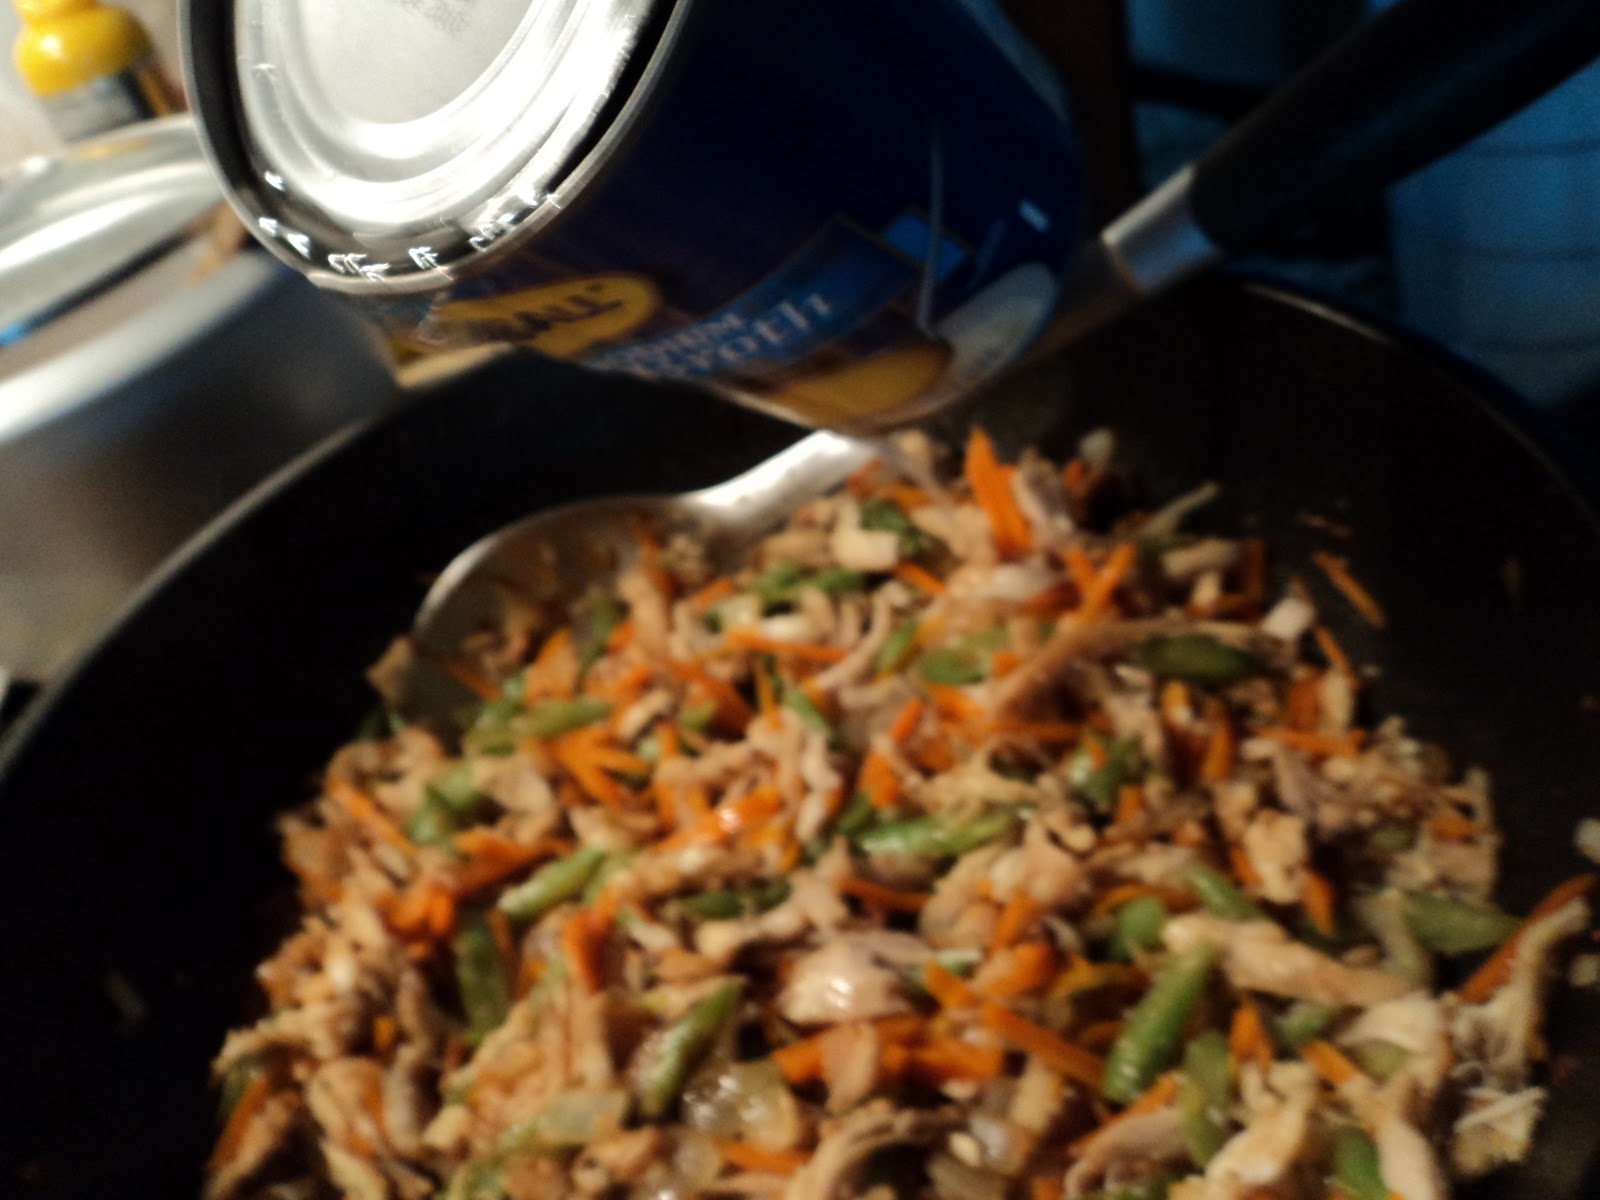
After a few mins add the chicken broth. I think I should of used 2 cans.


Let it cook for bout 5 mins. Man, don't this look good already? =D


Then you are going to add 1 chicken cube. I love these cubes compared to Knorrs.


Peek-a-boo I see you...Make sure that the cube disolves and mix, mix, mix!!!


It's NOODLES time!!! This is where you are gonna WORK your arms! LOL!


MIX...MIX..MIX...MIX


& MIX SOMEMORE AND MORE AND MORE!


Now that you got it mixed VERY WELL add cabbage! This cooking time won't take long at all. I normally let it simmer for 10 mins though just to let all the ingredients mariante...and at this point your house should smell divine!!! But after you add the cabbage make sure to MIX..MIX..MIX..LOL


=) I really hope you found this recipe easy to do and if you have any questions feel free to ask me. Your arms will be hurtting but your mouth will thank you for it. Enjoy this recipe everyone!!

xoxo,
Crisel

Lumpia

Lumpiang Sariwa: refers to “fresh,” or un-fried lumpia that are filled with sauteed veggies and meat and wrapped in a thin, homemade crepe–as opposed to store-bought spring roll wrappers.


Lumpiang Shanghai: is mostly ground pork with little vegtables.

Vegetable Lumpia: is the lumpia that I cook the most. It's basically ground beef, carrots, cabbage, green beans, onion, and garlic. I like to cook my filling first then deep fry it =) And this is the recipe I will share with you today. ENJOY!!


Things that I used:

- 1 lb ground beef
- 2 small carrots, julienned
- a handful of green beans
- 1/4 of a medium sized cabbage
- 1/2 yellow onion, diced
- 2 or 3 garlic gloves, chopped
- black pepper
- oil for frying
- lumpia wrappers

SUGGESTION: Cut all veggies for faster cooking time and if you have frozen lumpia wrappers defrost it while cutting veggies so it would be easy to peel off.
HELPFUL HINTS: This is how I cut my carrots and green beans. It's called julienne cut. A julienne (also called a "matchstick") is a type of cut that makes a long thin strip.


My carrots, green beans and cabbage julienned =D

After getting all the vegetables chopped and ready to go...LET'S START COOKING!!!

Get a Tbs of oil heated.


Start cooking onions and garlic.


Then add your ground beef. Brown your ground beef.

Add your pepper.


Once your ground beef is browned, add carrots and green beans and let cook til veggies are cooked through.

About 5 mins after adding veggies add 2-3 Tbs of Oyster Sauce.

Next, add the cabbage. This is optional but you can add a drizzle of oyster sauce. Not a lot just to get some on the cabbage.


This is how it should look. At this point I just want to get a hot bowl of rice and eat this just like this. LOL, but lets stay on track and start getting the lumpia ready!


Once it's done cooking I put it on a paper towel lined paper plate so that the oil can be drained out. You wanna make sure the filling isn't hot or wet. It will rip your lumpia wrappers.


While the filling is cooling this is a good time to peel your lumpia wrappers.


Okay, so this is a bowl of water to secure my lumpia together. Others use an egg that's scrambled but I find that water works just was well as an egg does. Plus, I don't waste any eggs. If yall don't know I love me some eggs. I aint gonna waste a good egg.


Let's get a wrappin'. Place your lumpia wrapper as diamond. I used a plastic spoon and scooped 2x. That is more than enough of filling. Try to make your filling equal. You dont want your lumpias to be a lot of different sizes. So once you get the 2 spoonfuls of filling spread it out to make a line.
 

Now take the bottom flap and pull it up pass the filling. Make sure when folding you do it real tight.


Roll it up til you reach the middle flaps.


So once you reached the middle flaps fold it toward the middle. It will look like and envelope. Again make sure your folding is tight and not loose.

Continue to roll up..Remember..TIGHT!!


Once you reach this point dip your finger in the water and lightly cover this area.


TADA!! Yay, your done...with 1 lumpia. HAHA!


I am finally done. whew, that took a while!


Okay, frying time! Get your pot filled bout 1/2 thick of oil and get it heated. You want to heat it on a medium/high. You don't want it too hot were the first layer is cooked but the inner lumpia skin isn't cooked through.


Get a bowl and line it w/paper towel so you can place your cooked lumpias in and drain the excess oil out.


Yay...it's frying! Again, you don't want to overcrowd your pan. You want everything to cook evenly.


It doesn't take long to cook so keep a good watch on them. It should look like this...golden brown. yummmmmy in my tummmmmmy!!!


First batch is done. Keep your lumpia standing up so that the oil can drip downwards.


It's DONE!!! Got my Jufran Sweet Chili Sauce!!!


Had to have my yummy lumpia with a tall glass of ice and my caffiene free diet coke!!


DIPPING SAUCE: 

There are 2 different sauces that can be used for lumpias. There is the sweet chili sauce and a garlic vinegar sauce.


This is the sweet chili saice that I always use. I think it's call Mae Ploy Sweet Thai Chili Sauce


This is the vinegar and garlic dipping sauce. I love this one too. Here is the recipe for this sauce. This is NOT sold in stores LOL.

Garlic-Vinegar Dipping Sauce


-3 cloves garlic, finely crushed
- 1/2 cup vinegar of choice
- 1/8 tsp. ground pepper
- Pinch of salt
- 1 tsp. shallots, finely chopped
- 1 chili pepper, chopped (optional)

Mix ingredients in a glass bowl and add more vinegar/pepper/salt as required.

Hope yall found this recipe to be easy and I hope you try this soon. If you have any questions, please don't hesitate to ask. ENJOY!!!